How to Set Up Scrapeless MCP Server on Cursor
Advanced Data Extraction Specialist
Introduction
Cursor is an intelligent code editor that integrates AI assistants like Claude and GPT-4. It supports the Model Context Protocol (MCP), allowing seamless integration of external data sources. This guide will walk you through setting up Scrapeless MCP Server on Cursor to enhance AI-powered workflows with real-time data retrieval.
What is Scrapeless MCP Server?
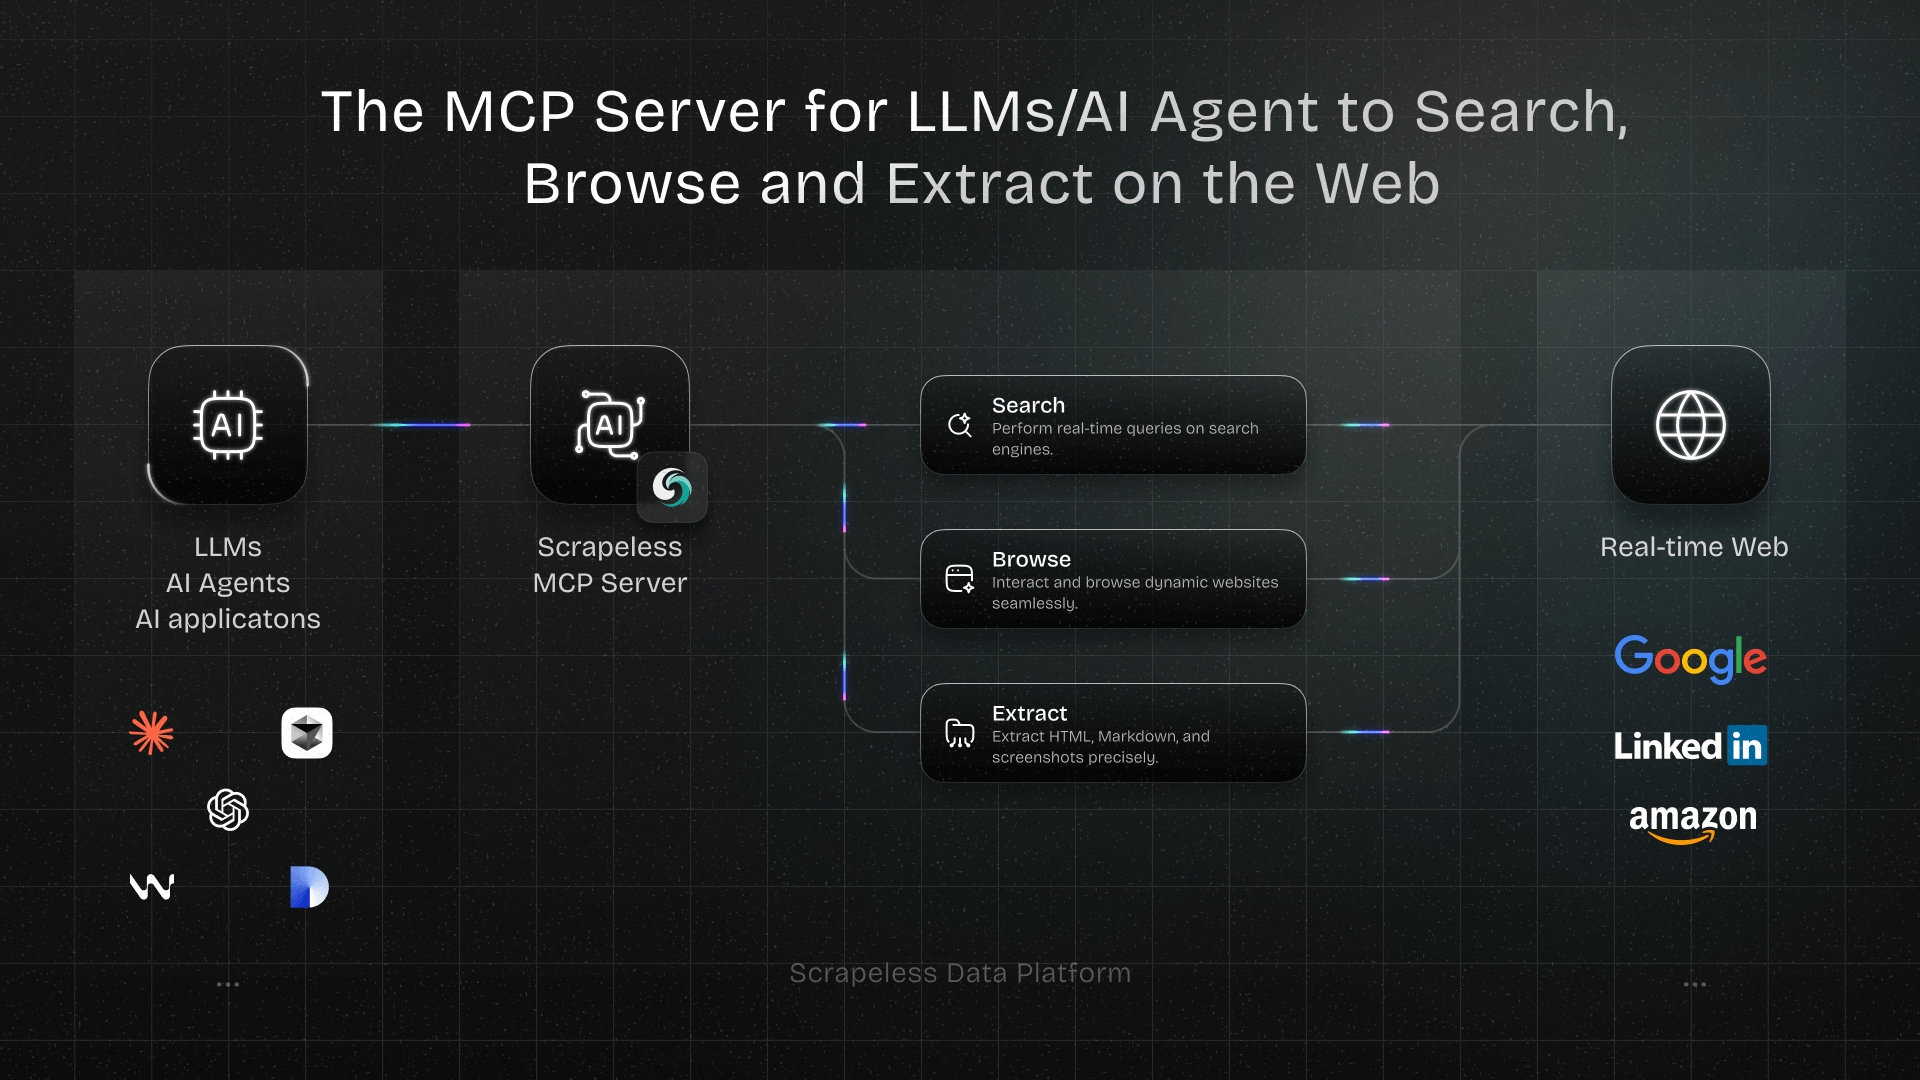
Scrapeless MCP Server is a server built on the Model Context Protocol (MCP) by Scrapeless. It enables AI models (such as Claude and GPT) to access external information sources during conversations. With advanced search capabilities, Scrapeless MCP Server retrieves real-time data from sources like Google Search, including Google Maps, Google Jobs, Google Hotels, and Google Flights, ensuring accurate and relevant responses.
How to Set Up Scrapeless MCP Server on Cursor
Step 1: Install Node.js and npm
To run Scrapeless MCP Server, you must first install Node.js and npm:
- Download the latest stable version of Node.js from the official website.
- Install it on your system.
- Verify the installation by running the following commands in your terminal:
node -v
npm -v- If installed correctly, you should see output like:
v22.x.x
10.x.x
Step 2: Obtain a Scrapeless API Key
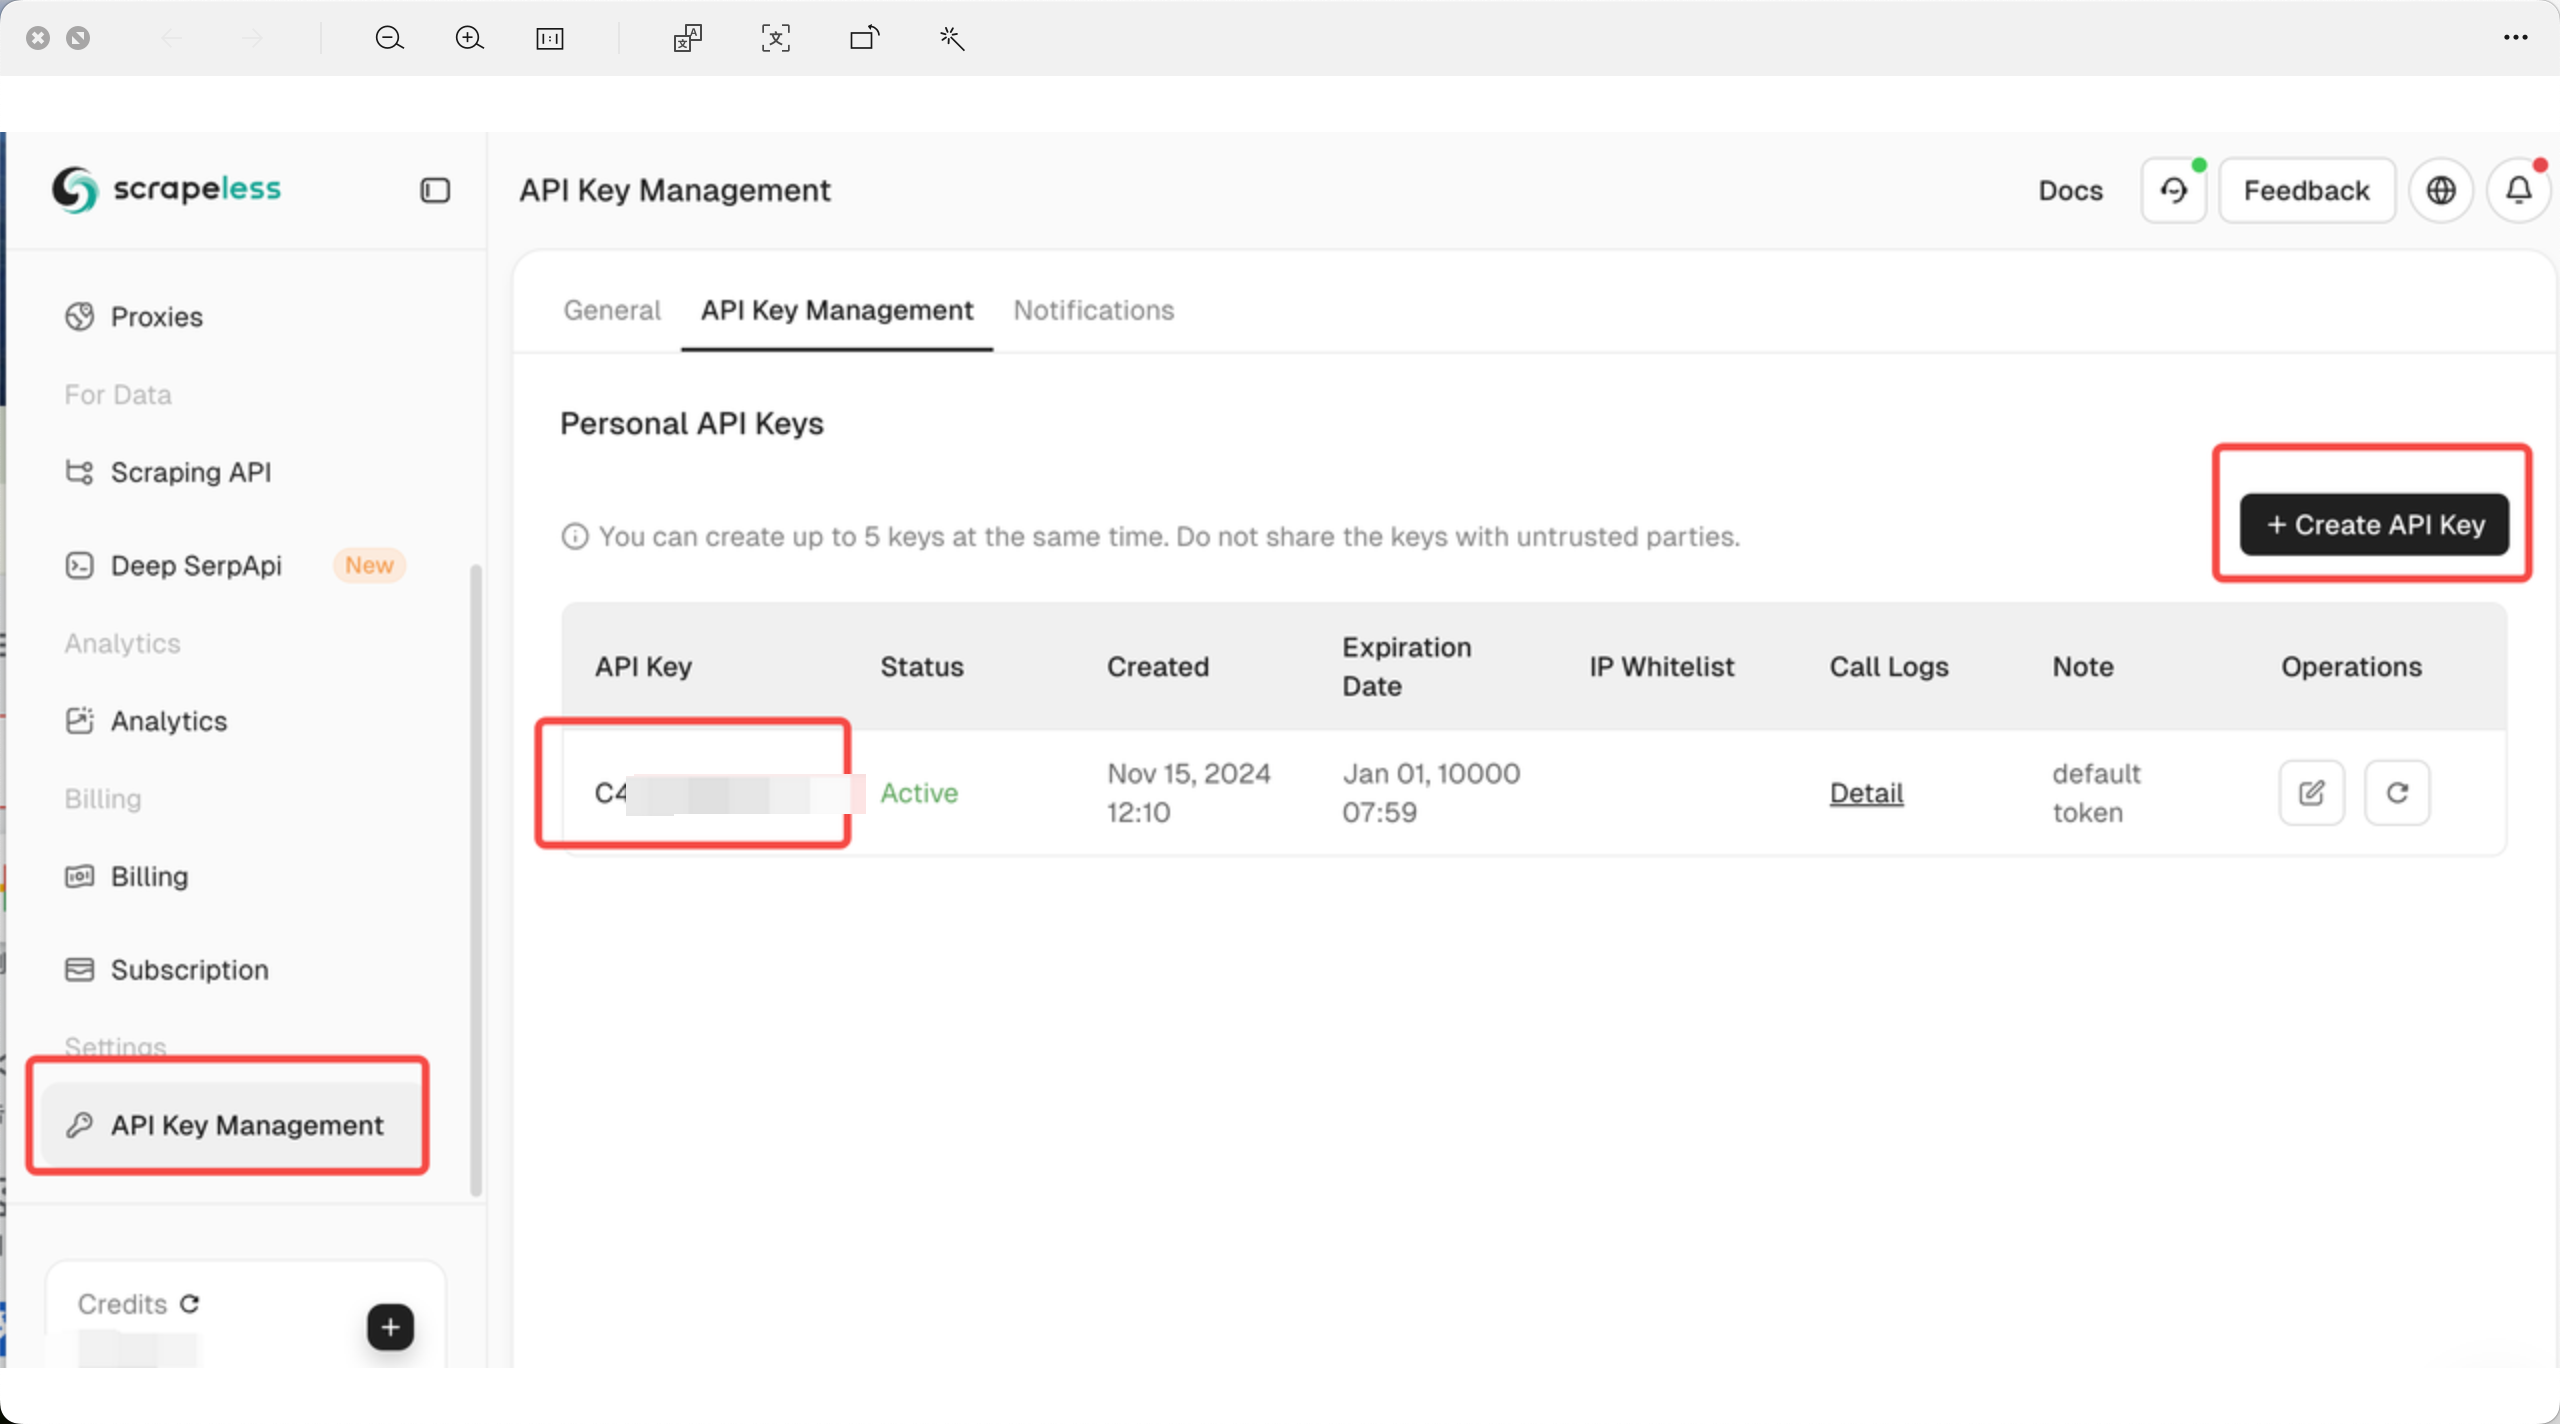
To use Scrapeless MCP Server, you need an API key:
- Register and log in to the Scrapeless Dashboard.
- Navigate to API Key Management and generate your Scrapeless API Key.
- Copy the key for later use.
Step 3: Configure Scrapeless MCP Server in Cursor
- Download and install the Cursor desktop application from the official site.
- Add Scrapeless MCP Server to Cursor
- Open Cursor and navigate to Settings.
- Select MCP from the left menu.
- Click Add new global MCP server to open the configuration panel.
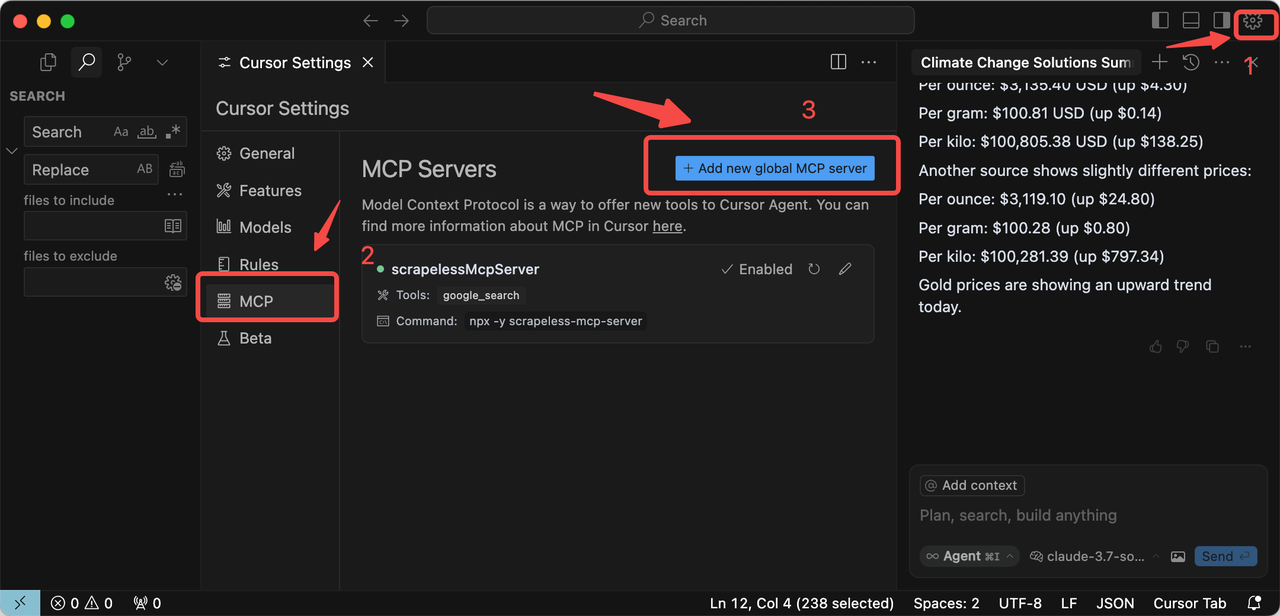
- Input the following configuration, replacing YOUR_SCRAPELESS_KEY with your API key:
{
  "mcpServers": {
    "scrapelessMcpServer": {
      "command": "npx",
      "args": ["-y", "scrapeless-mcp-server"],
      "env": {
        "SCRAPELESS_KEY": "YOUR_SCRAPELESS_KEY"
      }
    }
  }
}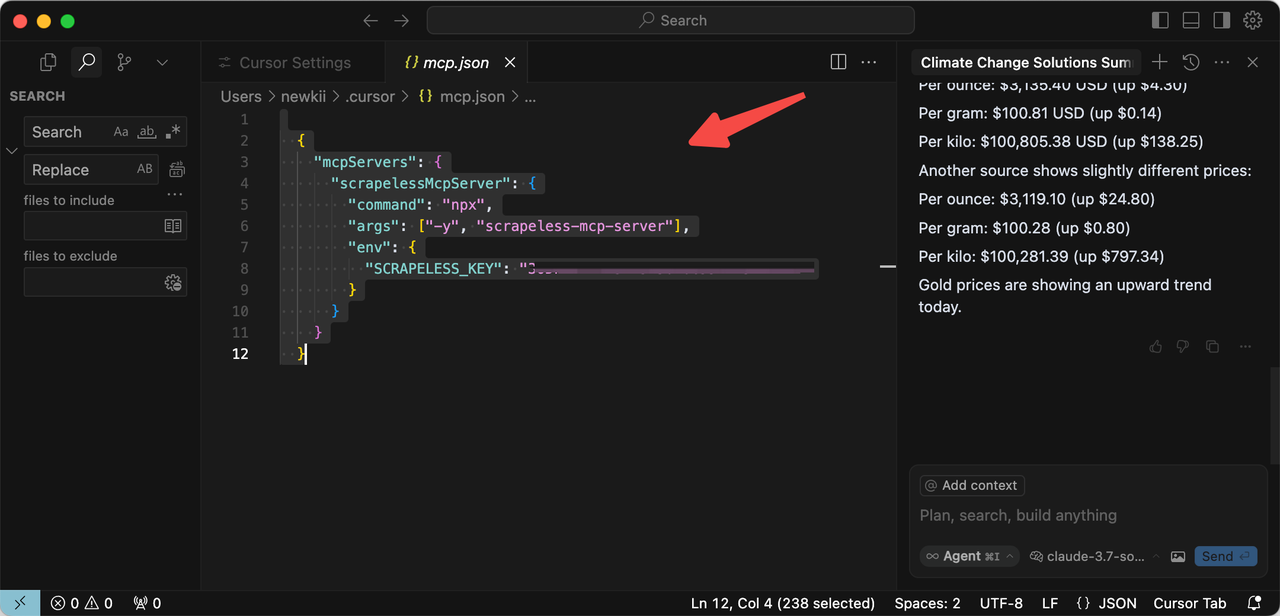
- Save the configuration and restart Cursor.
Step 4: Using Scrapeless MCP Server in Cursor
Once the setup is complete, you can start using Scrapeless MCP Server within Cursor by entering queries in the chat interface. For example:
Please help me check today's gold price.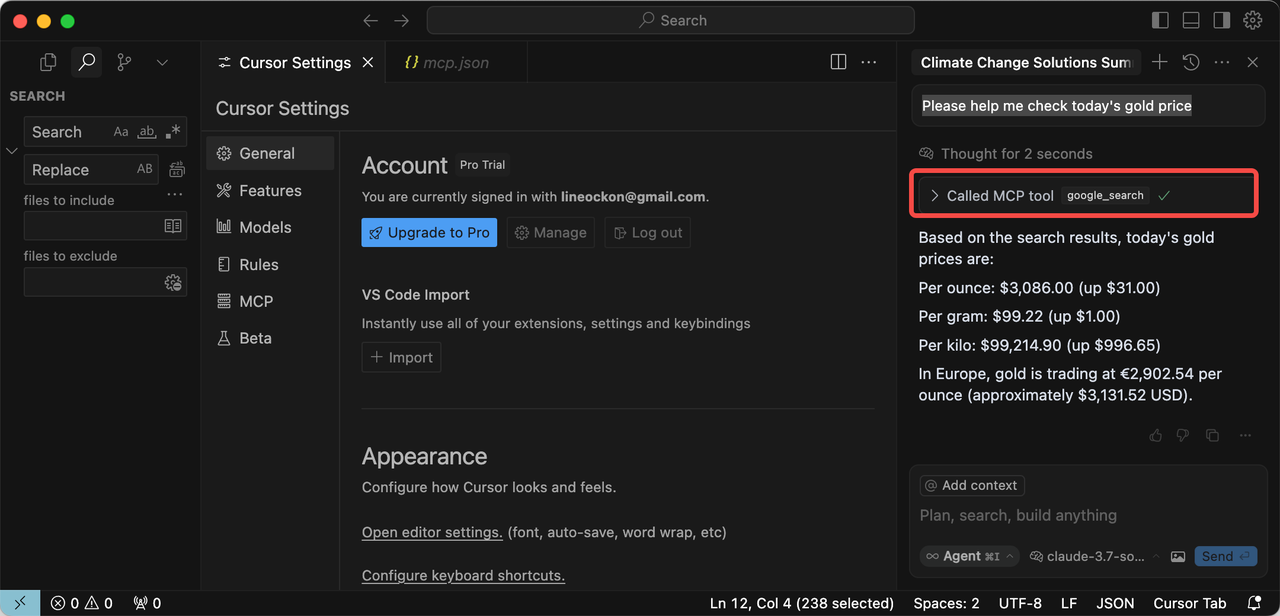
The cursor will then call Scrapeless MCP Server and return accurate real-time results.
Benefits of Using Scrapeless MCP Server on Cursor
- Real-time search: Access the latest data from external sources.
- Seamless integration: Works directly within Cursor’s AI-driven environment.
- Enhanced AI context: Enables AI models to provide more accurate and up-to-date responses.
Additional Resources
If you want to learn more, you can visit the Scrapeless Github
Conclusion
By integrating Scrapeless MCP Server with Cursor, you can significantly enhance AI-assisted coding with real-time information retrieval. Follow this guide to set up your environment and unlock the full potential of AI-powered development.
At Scrapeless, we only access publicly available data while strictly complying with applicable laws, regulations, and website privacy policies. The content in this blog is for demonstration purposes only and does not involve any illegal or infringing activities. We make no guarantees and disclaim all liability for the use of information from this blog or third-party links. Before engaging in any scraping activities, consult your legal advisor and review the target website's terms of service or obtain the necessary permissions.